Android Studio How To Download Android Things App
Davinder Singh is a Polymath. He loves reading, learning and writing technical cookbooks about new technologies.
![Google LLC [Public domain], via Wikimedia Commons](https://images.saymedia-content.com/.image/c_limit%2Ccs_srgb%2Cq_auto:eco%2Cw_700/MTc0NDgzOTE2MTMxMTQ5NDQ2/getting-started-with-android-things.png)
Google LLC [Public domain], via Wikimedia Commons
Wikimedia Commons
What Is Android Things?
Android Things is an Operating organisation (Bone) adult by Google for embedded devices such equally low powered microcontrollers. The operating organization is a special slice of organization software that manages the hardware and handles all the dirty work for you so that you can focus on more important things.
Why You lot Should Try It?
Android Things unlike other embedded operating systems, is powered by Google'south Android operating organization which runs on millions of devices. And hence comes with security, stability and API back up from Google. If you have never worked in the field of IoT before but you lot accept plenty of experience developing Android applications and then you lot can get started right away. Android Things also comes with a low-level hardware API which gives you lot full control of your hardware similar you lot used to have before. And lastly, because information technology is fun and you tin do lots of awesome things with it with very little endeavor.
Before Continuing
- I am assuming that y'all have Raspberry Pi or compatible board
- A computer (mac, PC or Linux) with stable internet connection
- Micro-USB cable
- Ethernet cable
- MicroSD card reader
- viii GB or larger microSD card
- HDMI cablevision and HDMI-enabled display
Download and Install Android Studio
Android studio is an official integrated evolution environment used for developing android applications. We volition apply this to write programs for android things and burn them to the lath (burning is a metaphor for installing). Here you will observe all the instructions and links required to prepare Android Studio on your reckoner.
Setting up Android Things
Y'all accept two options to install Android Things operating organisation. Either y'all can use the prebuilt package provided past Google or you can create your custom package. In this article, nosotros volition apply a custom paradigm for our raspberry pi.
- Caput to the Google Developer console past clicking hither.
- Sign in using your Gmail credentials.
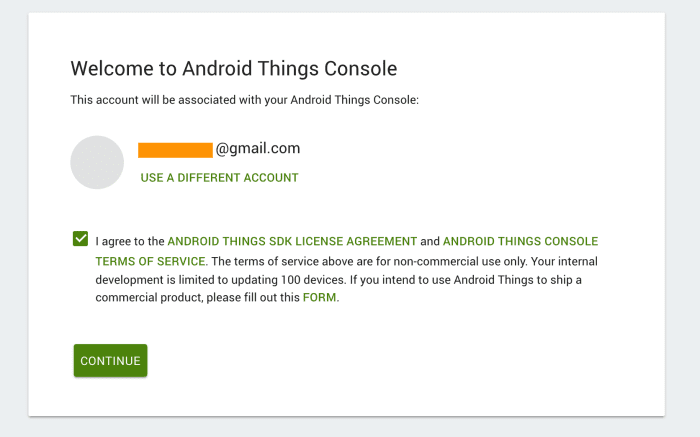
You lot will be greeted by following dialog, Take the license and keep,
Creating a New Android Things Os
After clicking continue, you will be greeted to Android Things. Hither you volition have to create a new production. The product is like a project. For every project, yous tin can create a unique product having unique features to handle the job at hand. Click create and then give your product a unique name (I'll proper noun my product Howdy World) and in SOM select Raspberry Pi 3.
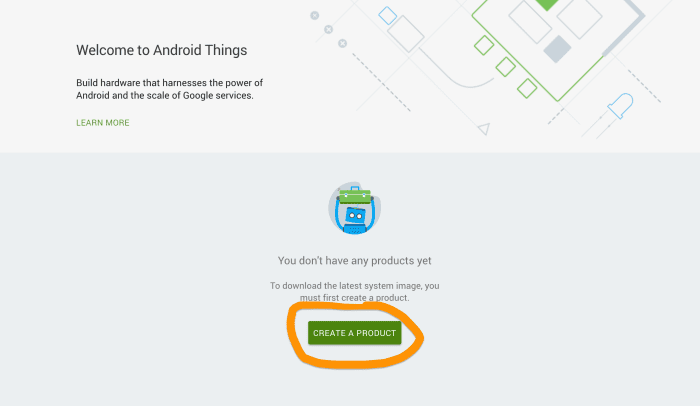
Create a product
Add a Model
Every product consists of several Models. Models help to unify the whole procedure of maintaining and updating the product. Android Things has Over The Air (OTA) update systems hence you can push button new features and improvements to all the devices on a unmarried go.

Create a new model
Let's Configure the Build
Subsequently a model has been created,
- Click on it (model). A new window will open.
- Click the new button and and so select Kickoff from scratch.
- Now give a name to your operating system (your operating arrangement heady).
- Keep on clicking on next, leaving the rest of the settings as it is till yous reach the sectionalization section.
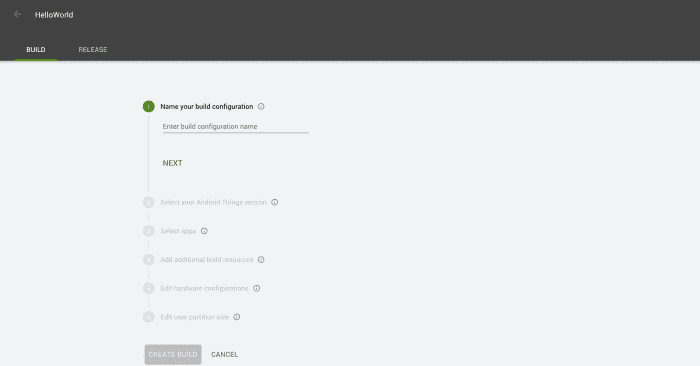
Configure the build
Configure Sectionalisation
Here you are presented with the selection to configure the partition of your final production. You get to choose what amount is to be left for application employ. 4096 MB (4 GB) is the minimum amount of space that tin can be allocated. You can configure this by adding the corporeality your memory bill of fare has. For example, if your retention menu is 8GB you lot will have to enter viii x 1024 = 8192 and and so on. Click on build the process should offset immediately.
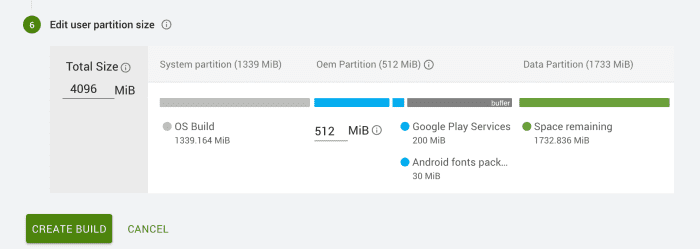
Infinite partition
Flashing Android things on device
one. Subsequently the build process click on Download and select development for now. Wait for Google to build your operating organization. The download should outset shortly. While it is being downloaded head to the Tools side menu and download the operating system flashing tool aka Setup Utility.
Android things tools
2. Later on download complete. Extract the nil file in a folder. Also, place the android-things nada file downloaded from the console. The directory should contain the following files at the moment
- Android-Setup utility folder containing various scripts (ane of them is for your Os).
- Raspberry Pi android things nix (mine is of 331 megabytes).
Don't forget to connect raspberry pi to your PC using usb cable before continuing
iii. If you are running Linux or Mac os, open bash and run the script by typing the path of the script equally follows,"./android-things-setup-utility/android-things-setup-utility-linux" or in case you are running mac os, "./android-things-setup-utility/android-things-setup-utility-mac". On windows simply double click open up windows executable file.
4. Enter i and hit enter or return fundamental.
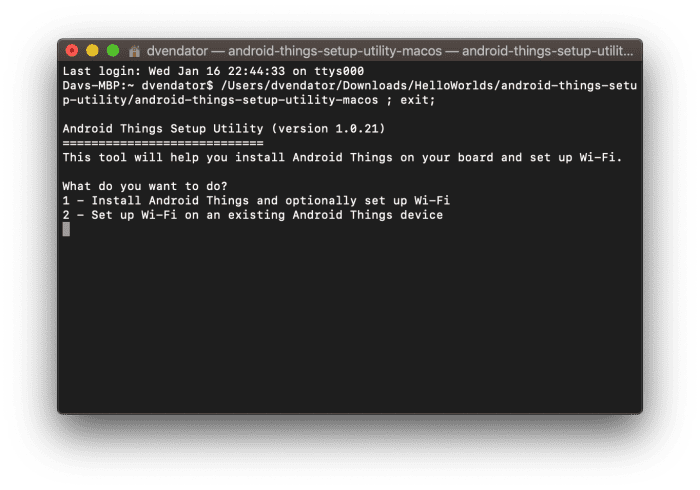
Android Things Setup Utility
v. Input one to select raspberry pi for, "What hardware are yous using?".
half-dozen. Now it volition ask for which image you want to install. Input two followed by the path to nil the file that you just congenital from the panel (containing your custom build).
vii. Setup should get-go.
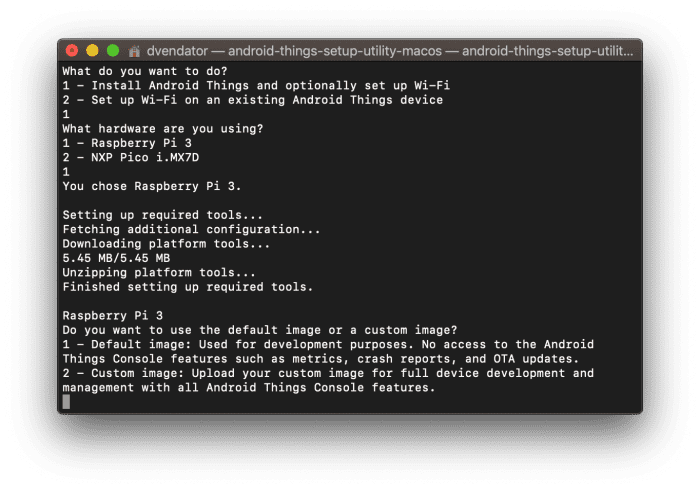
Setup Utility installing.
Testing the Install
Now is the time to test the installation. To test the installation we will write a simple program in Android studio to blink LED connected to one of the port of Raspberry Pi.
- Disconnect raspberry pi from your PC.
- Connect the short leg of the LED (the negative leg, chosen the cathode) to the GND (Pin 20).
- Connect the long leg of the LED (the positive leg, chosen the anode) to the GPIO pin (Pin 18).
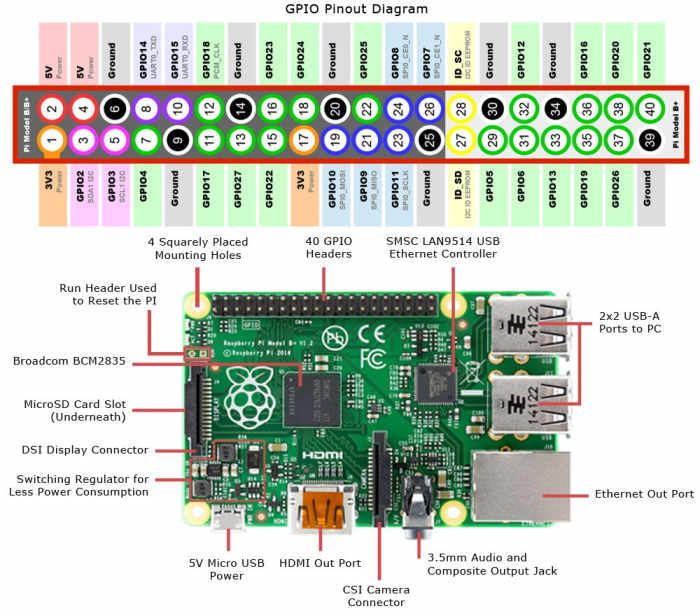
Raspberry Pi Pin configuration
Let'due south Write Some Code
After y'all are done with connections. Connect the raspberry pi with your PC once again. And run Android Studio.
- Create a new projection.
- Uncheck use Kotlin box.
- Give name to the project, location and a package proper name (com.helloworld.iot).
- Now in cull your projection click on Android Things and so select Android Things Empty Activity.
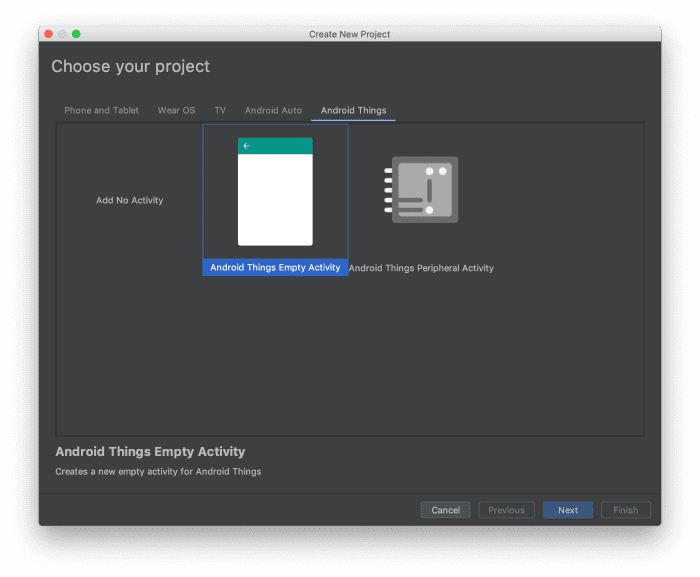
Android Studio –– Android things empty action
5. Give a name to the activity. and check Launch activeness automatically on boot. Click next and expect for android studio to set upwardly things for y'all.
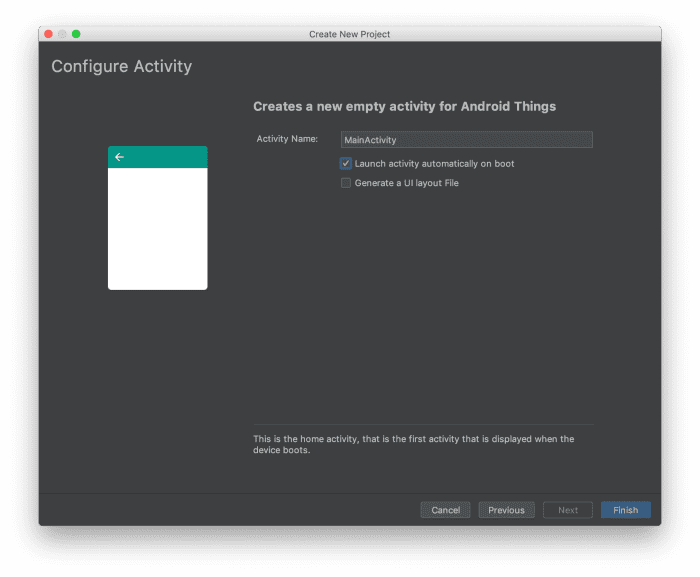
Android Things –– Give name to your action
half dozen. In the editor window (MainActivity.java), Paste the following lawmaking.
Code to Blink LED
public class MainActivity extends Action { individual static final String TAG = "MainActivity"; private static final int INTERVAL_BETWEEN_BLINKS_MS = k; individual static final Cord LED_PIN_NAME = 18; // GPIO port wired to the LED individual Handler mHandler = new Handler(); private Gpio mLedGpio; protected void onCreate (Package savedInstanceState) { super.onCreate(savedInstanceState); // Footstep 1. Create GPIO connection. PeripheralManager manager = PeripheralManager.getInstance(); try { mLedGpio = manager.openGpio(LED_PIN_NAME); // Step two. Configure every bit an output. mLedGpio.setDirection(Gpio.DIRECTION_OUT_INITIALLY_LOW); // Stride 4. Echo using a handler. mHandler.post(mBlinkRunnable); } catch (IOException eastward) { Log.eastward(TAG, "Error on PeripheralIO API", due east); } } protected void onDestroy () { super.onDestroy(); // Step 4. Remove handler events on close. mHandler.removeCallbacks(mBlinkRunnable); // Pace 5. Close the resource. if (mLedGpio != null) { try { mLedGpio.close(); } catch (IOException e) { Log.e(TAG, "Mistake on PeripheralIO API", e); } } } private Runnable mBlinkRunnable = new Runnable() { public void run () { // Exit if the GPIO is already closed if (mLedGpio == null) { return; } endeavor { // Footstep iii. Toggle the LED state mLedGpio.setValue(!mLedGpio.getValue()); // Footstep four. Schedule another event after filibuster. mHandler.postDelayed(mBlinkRunnable, INTERVAL_BETWEEN_BLINKS_MS); } grab (IOException due east) { Log.east(TAG, "Mistake on PeripheralIO API", e); } } }; } Building the Project
1. Make certain raspberry pi is continued before proceeding.
2. Click on the green pointer on the superlative and select your device in the run window.
3. Click next.
Note: If you ran into mistake or device doesn't bear witness up then become to following link or comment beneath with screenshot.
Wrapping Information technology Up
The LED should start blinking the moment lawmaking is uploaded. If it didn't work or you had hard fourth dimension understanding the commodity annotate below, I'll be happy to assistance you, Well, that's all for this 1. Promise you liked information technology. Cheers for reading.
This article is accurate and true to the all-time of the author'southward noesis. Content is for informational or entertainment purposes only and does not substitute for personal counsel or professional advice in business, financial, legal, or technical matters.
© 2019 Dav Vendator
bhattuc on April 09, 2020:
Highly technical but nicely explained. Thanks. Keep in affect.
Dav Vendator (writer) from Amritsar on March 28, 2019:
Android is Open Source Projection, Fifty-fifty if Google don't, The user is still free to Port security patches to the Raspberry Pi.
Matt R on March 27, 2019:
Good work. - Notwithstanding I'k worried that google wont back up android things anymore for devices like rpi :(
DOWNLOAD HERE
Posted by: irvingbutiffely72.blogspot.com


0 Comments